Documentation / Using WorkSealed
Tasks
Create tracking targets, start and stop work, and inspect or edit tasks without leaving the list.
On this page
Find a task
Open and narrow the list with these filters:
- Client and project: choose whose work to show.
- Status: All, Open, Completed, or Not Started.
- With Rate: show tasks with an explicit rate.
Use sortable column headings, paging controls, and refresh to navigate a longer list. A task’s client and project distinguish similarly named work for different customers.
Create a task
- Choose .
- Select the Client, then the Project.
- Enter Task Name and, optionally, a description and comment.
- Leave Hourly Rate empty to use the inherited rate shown below the field, or enter an override.
- Choose .
The parent client and project selectors are available when creating a task. They are not editable in the existing-task properties form.
Active list filters prefill the new task’s client and project without locking them. You can choose a different parent. After saving, WorkSealed adjusts filters that would hide the new task, brings it into view, and highlights its row. Press ⌘N on the Tasks list to open New Task and ⌘S to save.
Track work
- Open the menu-bar popover and choose .
- Select the task you are about to work on.
- Press and check the task name in the popover.
- Stop tracking at the end of the work period.
Starting a timer requires activity consent and can be prevented by a stop-tracking budget limit.
Keep the menu-bar app running while you track. Closing the main management window does not mean you have stopped the timer; use to end the session. Quitting WorkSealed from the menu bar also stops the active session.
Quick view
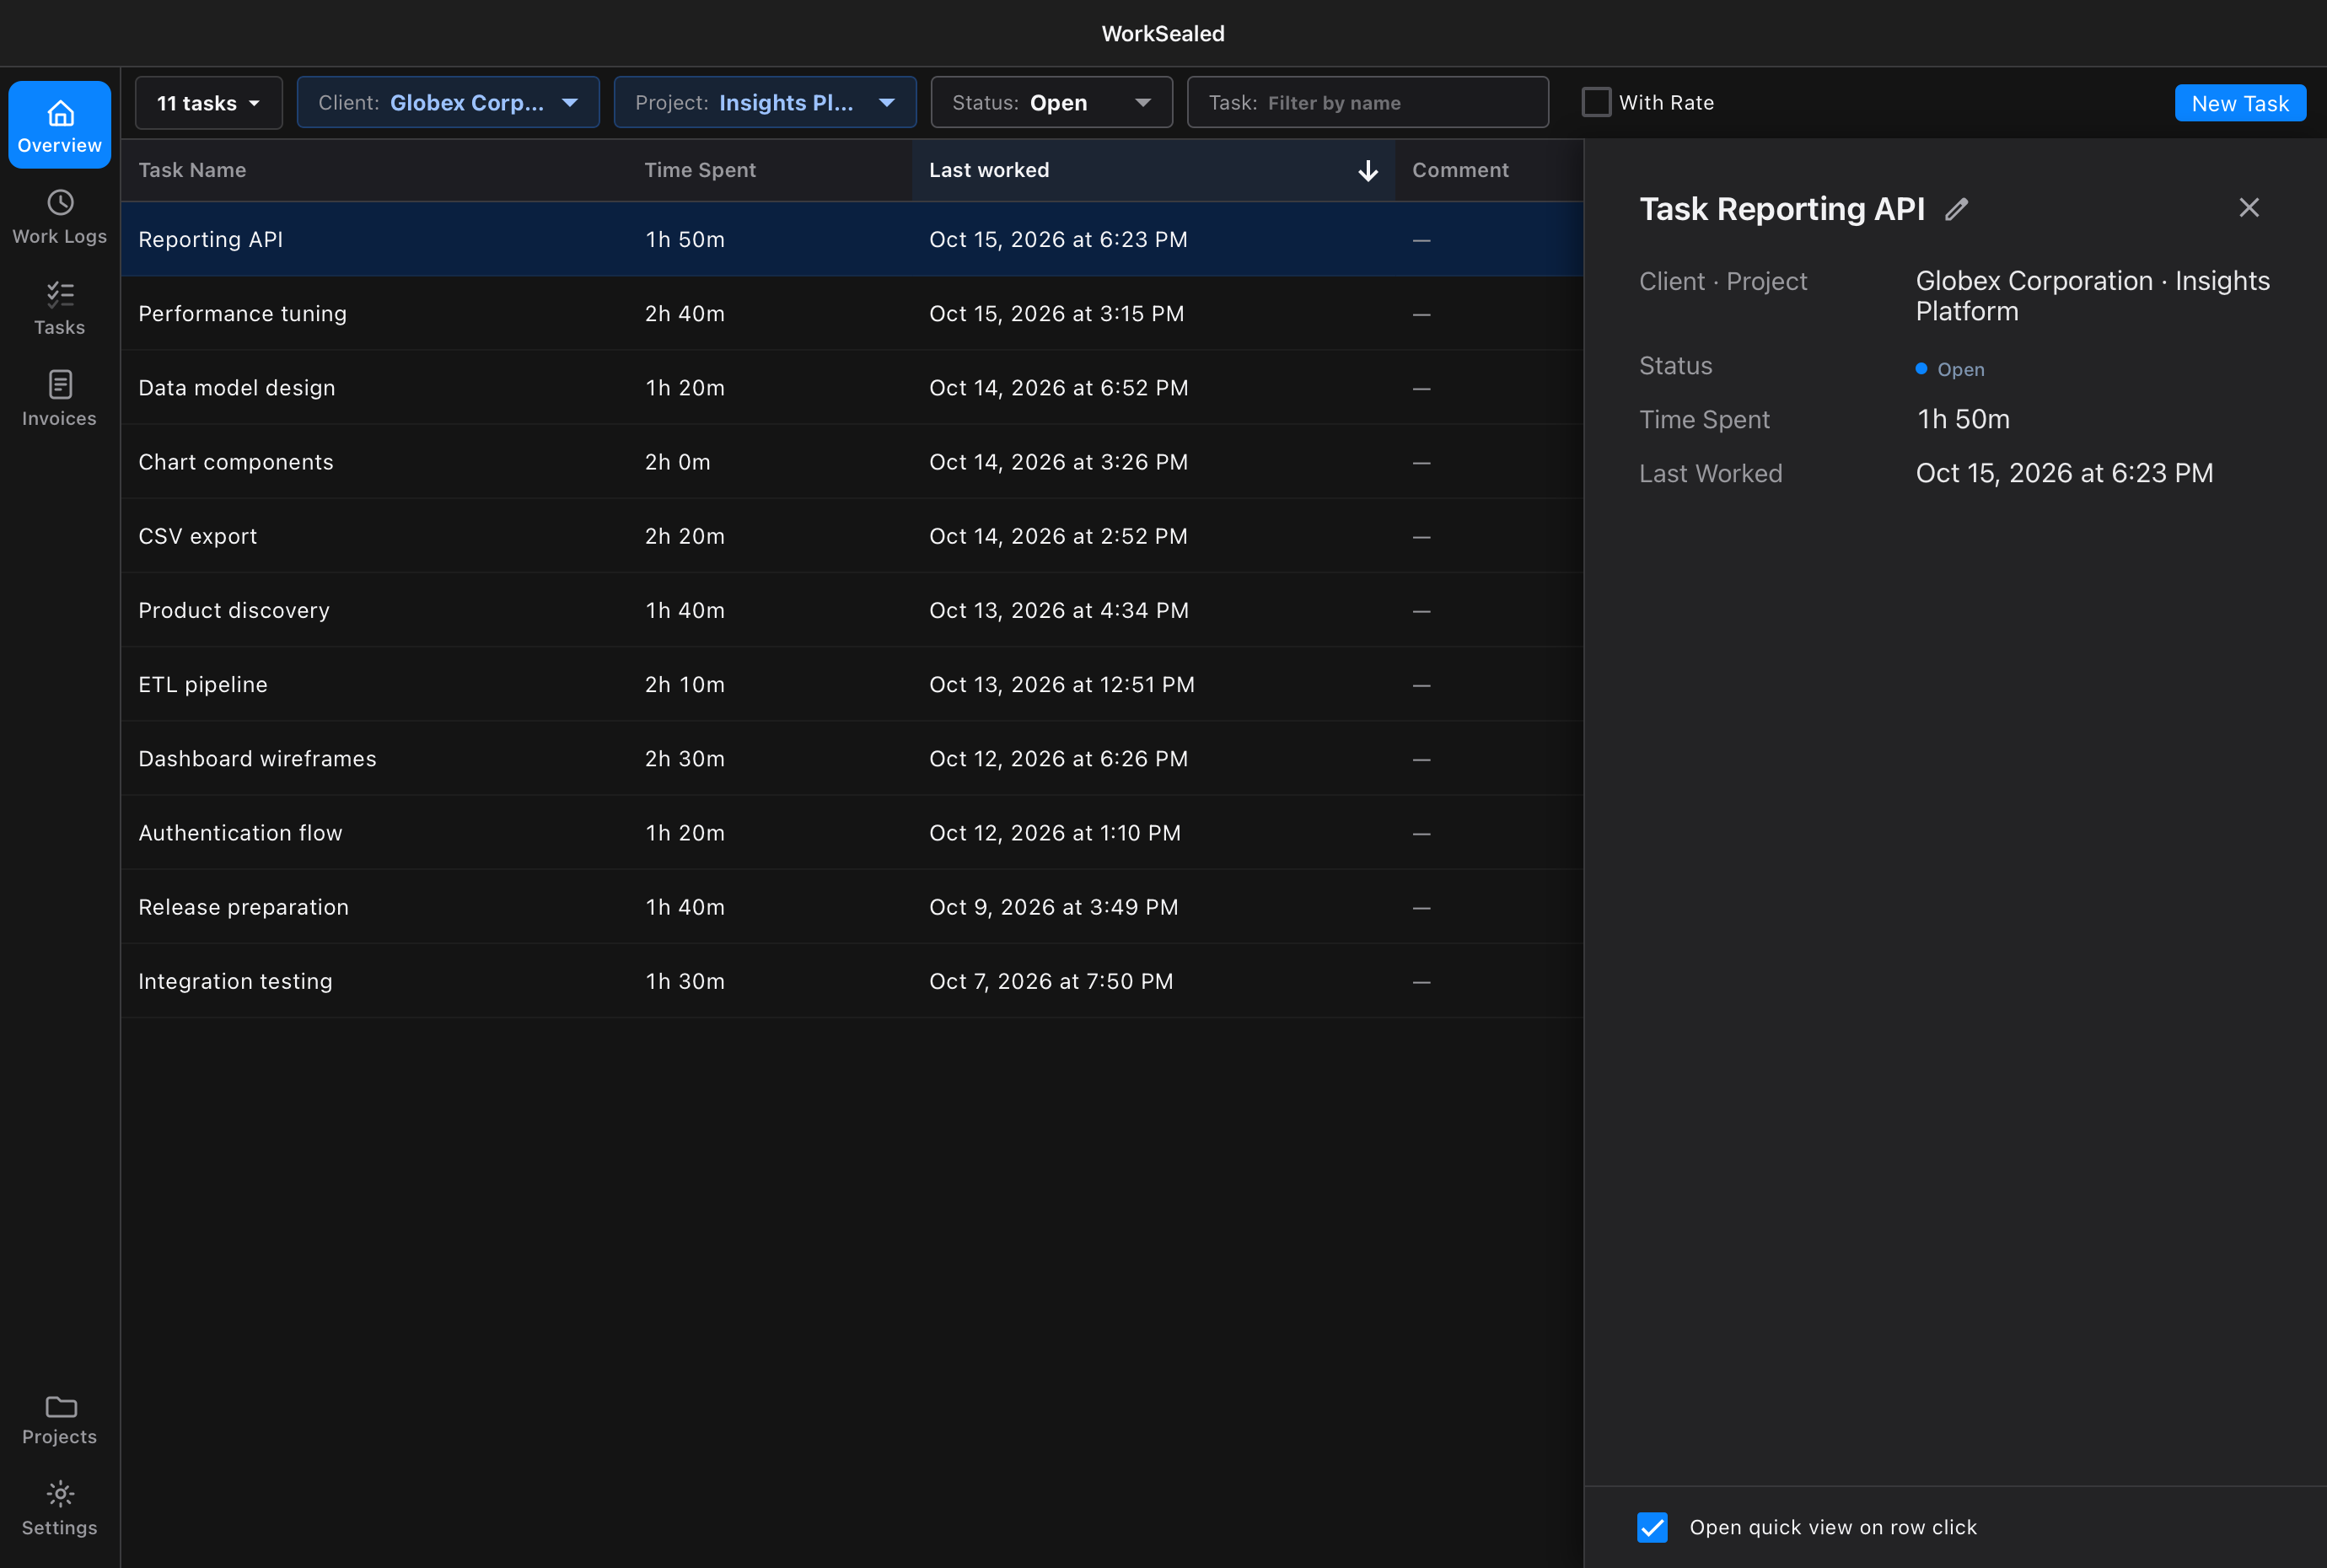
Open a row’s action menu and choose . The sheet appears beside the table; other rows and the toolbar remain usable.
The sheet shows:
- Assignment: client and project.
- Progress: status, time spent, and last-worked time.
- Context: description and comment, where available.
Use these controls in the sheet:
- : the pencil opens editing in the same sheet.
- : apply edits.
- : leave editing without saving.
- Close button or Escape: dismiss the sheet. Escape works when focus is inside the quick-view region.
Row clicks open quick view by default. Change Open quick view on row click in or the sheet’s footer. This preference is separate for Tasks, Invoices, and Work Logs.
Edit and complete a task
- Choose from the row menu, or edit through quick view.
- Update the name, description, rate override, or comment.
- Mark Completed for finished work; clear it when work resumes.
- Choose .
A new task rate applies to future captured work. Existing work logs keep their original rate. See rate propagation.
Delete a task
- Choose from the row’s action menu.
- Review the estimated impact on work logs and evidence.
- If work logs belong to an invoice, remove those lines where editing is permitted or handle the invoice first. Direct task deletion is blocked while they remain on an invoice.
- Confirm after checking the impact summary.
Deleted tasks and eligible related data can be restored from Recycle Bin until their purge date. Use Completed when you want to keep a finished task and its history.
Need a hand? Contact support.